The Right Frame Hanging Tools for a Level and Secure Picture
Hanging a picture frame sounds simple enough. You pick a spot, drive a nail, and hang the frame. But anyone who has stepped back to find a frame tilting to one side or watched it slide off the wall a week later knows that the process demands more than guesswork. Over the years, I have hung everything from small snapshots to heavy gallery wall pieces, and I have learned that the right frame hanging tools make the difference between a job done once and a job that needs fixing every few months.
The first thing to understand is that the wall itself is not your friend. Drywall, plaster, and old lath all behave differently. A nail that holds firm in one spot can pull loose in another. The weight of the frame, the type of hanging hardware on the back, and even the humidity in the room all play a role. That is why reaching for the right tools before you start saves time and frustration.
Start with the Frame Back
Before you even think about the wall, look at the back of your picture frame. The hardware attached there determines what you need on the wall side. Many frames come with a simple sawtooth hanger already screwed into the frame back. Sawtooth hangers work fine for lightweight frames under five pounds, but they have a weakness. They can shift slightly over time, especially if the frame gets bumped during cleaning. For anything heavier or more permanent, d-rings are a better choice. D-rings attach to the frame back with screws and give you two fixed points for picture wire to run through. This setup allows the wire to carry the weight evenly and keeps the frame from tilting forward at the bottom.
If your frame has d-rings, you will need picture wire. Not all picture wire is the same. Thin wire works for small frames, but a heavier frame demands braided wire rated for the weight. I once hung a large mirror using wire that was too light, and within a month the wire had stretched enough that the mirror sat crooked. Now I always check the weight rating on the spool and use a wire cutter to trim the exact length I need. After cutting, I thread the wire through the d-ring, wrap it around itself, and use wire twisting pliers to twist the ends into a tight coil. A good twist keeps the wire from slipping through the d-ring under load. A wire tightener tool can then take up any slack and pull the wire taut.
Measuring and Marking
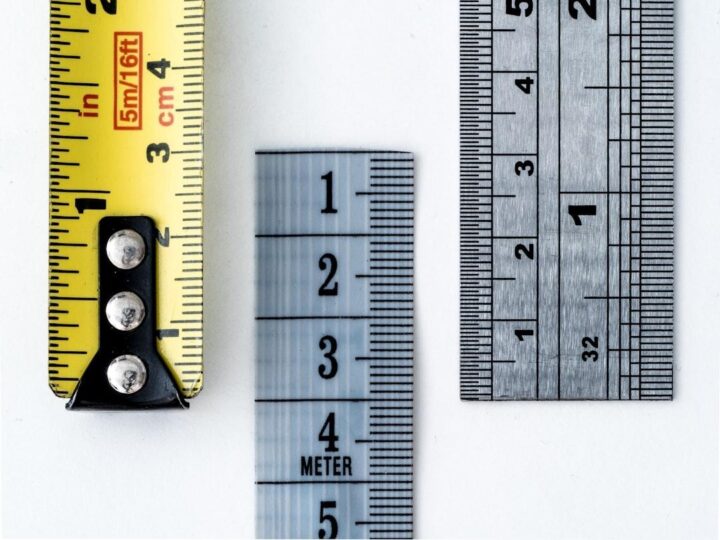
Once the wire is on the frame, you need to find the right spot on the wall. A tape measure is the most basic tool, but it is also the most important. Measure the height of the frame and decide where you want the top edge to sit. Standard gallery height puts the center of the frame at eye level, roughly 57 to 60 inches from the floor. Mark that spot lightly with a pencil. Then measure the distance from the top of the frame to the point where the wire forms a peak when the wire is pulled tight. That distance tells you where to put the picture hook or nail on the wall.
Before you drive anything into the wall, use a stud finder. Stud finders are not just for heavy shelves. Even a medium-sized frame can benefit from being anchored into a stud, especially if you live in an old house with plaster walls. If you cannot find a stud in the right spot, you will need a wall anchor. Plastic wall anchors or molly bolts spread the load across the drywall and prevent the nail from pulling out. For lightweight frames, a simple picture hook with a small nail can work, but I have seen too many picture hooks pull out of the wall because the nail was too short or the anchor was missing. A nail set can help you drive the nail flush with the wall without marring the surface. A hammer is obvious, but a good hammer with a smooth face reduces the chance of denting the wall around the nail.
Leveling and Adjusting
After the nail or hook is in place, hang the frame and check it with a bubble level. A bubble level is a simple tool, but it is easy to misuse. Place the level on top of the frame or along the bottom rail. If the bubble sits between the lines, the frame is level. If not, adjust the frame slightly. Some frames have adjustable hardware that lets you shift the frame left or right without moving the nail. If your frame does not have that, you may need to reposition the hook or add a second nail. For a gallery wall with multiple frames, a leveling tool that uses a laser can save time, but a standard bubble level works fine for most setups.
The phrase frame hanging tools might sound like a collection of gadgets, but in practice it is a small set of reliable items. A tape measure, a stud finder, a bubble level, a hammer, a nail set, picture wire, wire twisting pliers, and a pencil cover almost every situation. I keep these in a small drawer near my workbench, and I grab them whenever a new piece arrives. The investment is small, and the payoff is a wall full of frames that stay straight and secure.
When to Use Alternative Hanging Methods
Not every wall can take a nail. Renters, tile backsplashes, and metal door frames call for different solutions. Command strips are a popular choice for lightweight frames on painted drywall. They work well if you follow the instructions precisely: clean the wall with rubbing alcohol, press the strip firmly, and wait an hour before hanging the frame. But command strips have limits. They do not hold well on textured walls or in humid bathrooms, and they can lose adhesion over time if the frame is heavy. For frames under ten pounds, they are a reasonable alternative. For anything heavier, stick with mechanical fasteners.

Another option is the adhesive wall anchor, which sticks to the wall and holds a screw. These can work on tile or glass, but I have had mixed results. The adhesive can fail if the surface is not perfectly clean or if the temperature changes. In those situations, a proper drywall screw driven into a stud is still the most reliable method. A drywall screw with a wall anchor behind it gives you a solid hold that will not budge.
Gallery Walls and Multi-Frame Layouts
When you start hanging multiple frames in a gallery wall arrangement, the right frame hanging tools become even more important. I once spent an afternoon hanging a dozen frames for a friend, and without a stud finder and a bubble level, the whole thing would have been a mess. I used a tape measure to space the frames evenly and a pencil to mark the top edge of each frame. For frames with d-rings and picture wire, I adjusted the wire tension so that each frame hung at the same height. A leveling tool with a laser helped me check alignment across the entire wall, but a long bubble level and a straightedge can do the same job.
The key to a successful gallery wall is planning. Lay the frames on the floor first and arrange them until the composition looks right. Measure the distance between frames and transfer those measurements to the wall. Then hang the center frame first and work outward. Each time you hang a frame, check it with a bubble level before moving to the next. Small errors compound quickly, so take the time to get each one right.
Final Thoughts on Hanging Hardware
I have learned that the phrase frame hanging tools covers more than just the items you buy at the hardware store. It also includes the knowledge of when to use each tool. A sawtooth hanger is fine for a small frame in a low-traffic area, but a d-ring with picture wire is better for a heavy frame above a sofa. A picture hook works on drywall if you use a wall anchor, but a stud finder is the only way to guarantee a hold in plaster. A bubble level is essential, but a tape measure is what keeps your layout symmetrical.

If you take one thing away from this, let it be this: invest in a basic set of frame hanging tools and learn how to use them properly. The time you spend measuring, finding studs, and leveling will pay off every time you walk into the room and see your frames sitting straight. A crooked frame is a small thing, but it catches the eye every time. A level, secure frame fades into the background and lets the art or photo inside do its job.
Whether you are hanging a single family portrait or building a full gallery wall, the tools are simple and the process is straightforward. A hammer, a nail set, picture wire, wire twisting pliers, a tape measure, a stud finder, a bubble level, and a pencil are all you really need. Add a wire tightener and a good set of wall anchors for heavier pieces, and you are set for any project. The next time you bring home a new picture frame, take a few extra minutes to do it right. Your walls will thank you.